Roof Valley Replacement: When Melbourne Valleys Need Replacing, What Materials Last Longest, and What the Process Involves
- Blog
- October 29, 2026
Quick Overview:
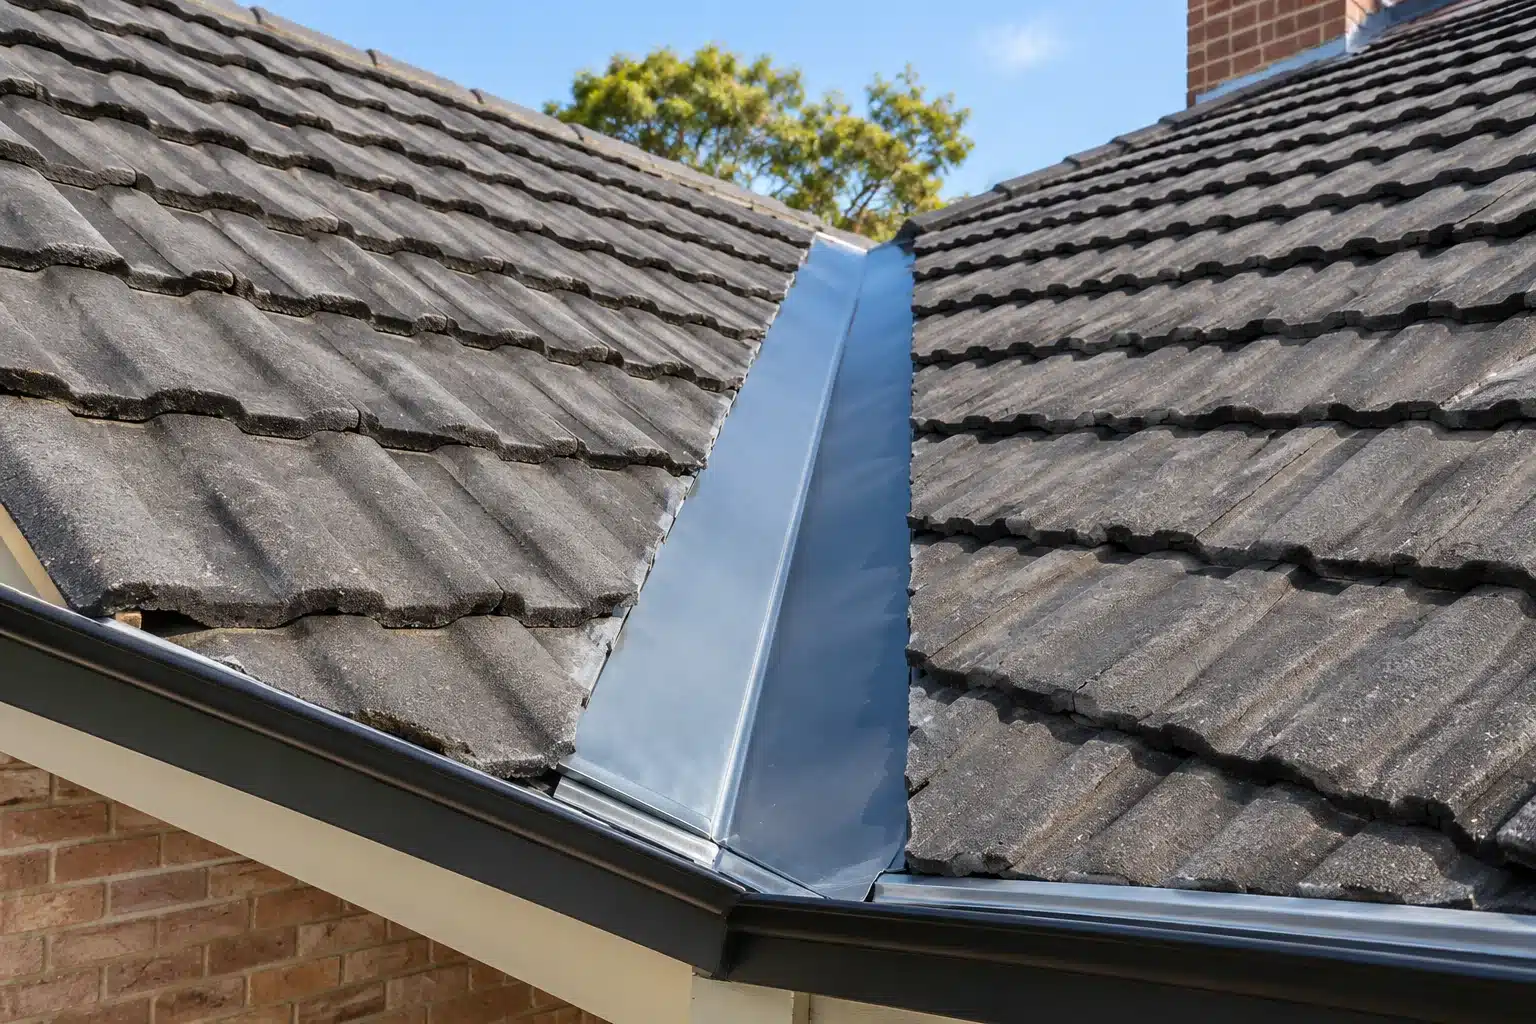
Roof valley replacement involves removing the old, failed valley flashing and installing new flashing where two roof slopes meet. Valleys are the highest water-volume channels on any tiled roof, collecting and directing rainwater from two converging roof planes down to the gutters. Because of this concentrated water flow, valleys fail before most other roofing components, particularly on homes across Melbourne’s northern suburbs where older galvanised steel valleys have been exposed to decades of weather. The most common reasons for replacement are corrosion and rust (the original galvanised coating has worn away and the steel is disintegrating), cracking in old mortar-bedded valleys, physical damage from falling branches or foot traffic, and incorrect original installation (valleys too narrow, insufficient overlap, poor tile cutting). Replacement involves lifting the tiles on both sides of the valley, removing the old flashing, inspecting and repairing the timber valley board underneath, installing new valley flashing (Colorbond steel or zincalume are the current standards), and relaying the tiles with correct overlap and valley clearance. At Roof Restoration Northern Suburbs, roof valley replacement is one of the most frequently requested repairs because Melbourne’s northern suburbs housing stock includes thousands of tiled roofs from the 1950s to 1980s with original galvanised valleys approaching or past the end of their service life. For identifying whether your valleys are failing, read the roof valley problems guide.
Why Roof Valleys Fail
Valleys fail because they endure more stress than any other part of the roof. Understanding the failure mechanisms explains why replacement (not patching) is the correct solution once the valley has deteriorated past a certain point.
Corrosion and rust. The most common failure mode on older Melbourne homes. Original galvanised steel valleys from the 1950s to 1980s were coated with a zinc layer that protected the underlying steel from corrosion. Over 30 to 50 years of exposure to rain, heat, cold, and atmospheric pollution, the zinc coating wears away. Once the bare steel is exposed, rust begins and progresses steadily. Rust holes develop, water enters the roof cavity, and the valley can no longer perform its primary function. Once rust has penetrated the steel, no amount of sealant, paint, or patching restores the valley’s integrity. Replacement is the only lasting solution.
Table of Contents
ToggleDebris accumulation and water damming. Leaves, twigs, lichen, and moss accumulate in valleys because valleys are the lowest point between two roof slopes. Debris traps moisture against the flashing, accelerating corrosion. It also creates dams that force water sideways under the tiles rather than down the valley. Regular gutter cleaning and valley clearing reduces this risk, but once the underlying metal has corroded, clearing the debris alone does not solve the problem.
Mortar and sealant failure. On many older tile roofs, the tiles alongside the valley were bedded in mortar. Over decades, this mortar cracks, loosens, and separates from the tiles and the valley flashing, creating gaps where water enters. Modern valley installations use flexible sealants and mechanical fixing rather than rigid mortar, which is why a full replacement outperforms repointing or patching the old mortar. For the difference between rebedding and repointing, read the roof repointing cost guide.
Physical damage. Falling branches, tradesperson foot traffic (antennas, solar installations, air conditioning), and hail can dent, crack, or puncture valley flashing. A single dent can create a low point where water pools instead of flowing, accelerating corrosion at that spot.
Incorrect original installation. Some valleys were installed too narrow for the roof pitch, with insufficient tile overlap, or with tiles cut too close to the valley centreline. These installation shortcuts create leaks from day one, and no amount of sealant fixes a valley that was never wide enough or correctly set up.
When to Repair vs When to Replace
Not every valley issue requires full replacement. The decision depends on the extent and type of the damage.
| Valley Condition | Action | Why |
|---|---|---|
| Surface rust only (no holes, steel still solid underneath) | Repair: clean, treat rust, apply rust converter, seal, and paint | The steel still has structural integrity. Surface treatment extends the life by 5 to 10 years. Monitor annually. |
| One or two small rust holes in an otherwise sound valley | Repair: patch with compatible flashing and sealant | Localised failure. Patching buys time but the rest of the valley is on the same trajectory. Plan for replacement within 3 to 5 years. |
| Multiple rust holes, widespread corrosion, steel thinning | Replace | The valley has reached the end of its service life. Patching multiple areas costs almost as much as replacing and does not last. |
| Mortar cracking and separating along the valley tiles | Repair if the valley metal is sound. Replace if the metal is also corroded. | Mortar failure alone can be repointed. But mortar failure on an old valley usually accompanies metal corrosion underneath. |
| Valley too narrow or incorrectly installed (chronic leaks despite no visible corrosion) | Replace with correctly sized valley | The original installation was wrong. No repair fixes an undersized valley. It needs to be removed and replaced with the correct width and overlap. |
| Valley leaking during heavy rain only | Investigate first. May be debris damming, may be corrosion, may be tile overlap issue. | Heavy-rain-only leaks often indicate a blockage or a capacity issue. Clear the valley and inspect before deciding on repair or replacement. |
| Valley replacement as part of a full roof restoration | Replace all valleys during the restoration | If the roof is being fully restored (cleaned, repointed, painted), replacing the valleys at the same time is the most cost-effective approach. The tiles are already being worked on and access is available. |
Valley Materials: What Gets Installed
The material used for the replacement valley determines how long it lasts.
| Material | Lifespan | Characteristics | Best For |
|---|---|---|---|
| Colorbond steel | 30 to 50 years | Pre-painted steel with a baked-on colour coating over a zinc/aluminium alloy base (zincalume). Corrosion-resistant, colour-matched to the roof, does not require painting after installation. The current industry standard for valley replacement in Melbourne. | Most residential valley replacements. Colour matches the roof or contrasts as desired. |
| Zincalume (unpainted) | 25 to 40 years | Zinc and aluminium alloy coated steel without a colour topcoat. Slightly less corrosion-resistant than Colorbond (the paint layer adds an extra barrier) but still far superior to old galvanised steel. | Where colour matching is not a priority. Budget-conscious replacements. Often used under tiles where the valley is not visible. |
| Lead | 50+ years | Traditional valley material, extremely durable and malleable. Rarely used in modern residential work due to cost and health concerns with handling. | Heritage restorations where original materials must be matched. Not typical for standard residential work. |
| Old galvanised steel | 20 to 35 years (already past life on most Melbourne homes) | The material being replaced. Zinc-coated steel without the aluminium alloy component. Inferior corrosion resistance to zincalume and Colorbond. No longer used for new valley installations. | Not recommended for new installations. |
At Roof Restoration Northern Suburbs, Colorbond steel is the standard valley replacement material because it offers the best combination of longevity, corrosion resistance, and appearance.
The Replacement Process Step by Step
Valley replacement is not a quick patch. It is a structured process that involves multiple stages and typically takes one day per valley (longer for complex roof configurations or multiple valleys).
Step 1: Roof assessment. The entire roof is inspected, not just the failed valley. Other valleys, ridge capping, flashing, tiles, and the gutter system are checked because problems rarely occur in isolation. If multiple valleys need replacement, doing them together is more efficient than one at a time.
Step 2: Tile removal. The tiles on both sides of the valley are carefully lifted and stacked. Typically 3 to 5 tile courses on each side need to be removed to access the full width of the valley. Tiles are handled carefully to avoid breakage. Cracked or broken tiles discovered during removal are noted for replacement. For homes where tiles are already in poor condition, read the cracked roof tile repair and loose roof tiles guides.
Step 3: Old valley removal. The old valley flashing is removed. This includes extracting any nails or screws, removing old mortar, and cleaning the valley board (the timber board the valley flashing sits on) of all debris, rust residue, and old sealant.
Step 4: Valley board inspection and repair. The timber valley board is inspected for rot, water damage, and structural soundness. If the old valley has been leaking for a prolonged period, the valley board may be soft, rotten, or partially decayed. Damaged sections are replaced or sistered (a new timber piece fixed alongside the old one for reinforcement) before the new valley is installed. Installing new flashing on a rotten board is a wasted effort because the fixings will not hold and the board will continue to deteriorate.
Step 5: New valley installation. The new valley flashing (Colorbond or zincalume) is cut to length and laid along the valley board. The flashing is fixed with appropriate fasteners (stainless steel or compatible metal to avoid galvanic corrosion). Where multiple sheets are needed, they are overlapped in the direction of water flow (upper sheet over lower sheet) with a minimum overlap of 150mm and sealed at the joint.
Step 6: Tile relaying. The tiles are relaid on both sides of the valley with the correct overlap over the valley flashing. A minimum clearance is maintained between the cut edge of the tile and the centreline of the valley (typically 50 to 75mm on each side) to ensure water flows freely down the valley without being obstructed by tiles sitting too close together. Tiles are re-fixed with clips or screws where required, and the junction is sealed with flexible pointing compound (not rigid cement mortar, which cracks).
Step 7: Testing and cleanup. The completed valley is water-tested by running a hose along its length to confirm water flows cleanly to the gutter with no leaks, no pooling, and no sideways diversion under the tiles. The roof is cleaned of debris, and any displaced tiles elsewhere on the roof are checked and re-seated.
How Many Valleys Does Your Roof Have
The number of valleys on a roof depends on the roof shape. This matters because if one valley has failed from corrosion, the other valleys (installed at the same time from the same material) are likely approaching the same condition.
| Roof Type | Typical Valley Count | Notes |
|---|---|---|
| Simple gable roof (two slopes) | 0 | No valleys. Two planes meet at a ridge, not a valley. Gable roof repair covers the common failure points. |
| L-shaped roof | 1 to 2 | Where the two wings of the L meet, a valley forms. |
| T-shaped or cross-gable roof | 2 to 4 | Each intersection creates a valley. Common on 1960s to 1980s homes in Melbourne’s northern suburbs. |
| Complex roof (multiple wings, dormers, additions) | 4 to 8+ | Every intersection, dormer, and addition junction creates a valley. These roofs have the most valley exposure and the highest maintenance and replacement costs. |
| Hip roof with extensions | 1 to 4 | Valleys form where extensions or wings meet the main hip roof. |
If your roof has multiple valleys and one has failed, it is worth having all of them inspected at the same time. Replacing all failing valleys in a single project avoids multiple mobilisations, reduces the per-valley cost, and ensures the entire roof is protected rather than having one new valley next to several that are close to failure.
Valley Replacement as Part of a Full Roof Restoration
The most cost-effective time to replace valleys is during a full roof restoration. When the roof is being cleaned, repointed, and painted, the tiles are already being worked on, access is set up, and the crew is on site. Adding valley replacement to the restoration scope costs less than doing it as a standalone project because there is no separate mobilisation, scaffolding, or tile handling.
A full restoration typically includes:
- High-pressure roof cleaning
- Rebedding and repointing of ridge capping
- Valley replacement where needed
- Roof flashing repair or replacement
- Broken or cracked tile replacement
- Roof sealing and painting
When asking for a quote, ask whether valley replacement is included in the restoration scope or quoted as a separate item.
Signs Your Valley Needs Replacing Now
For the full diagnostic guide, read roof valley problems. The urgent signs that indicate the valley needs replacement rather than monitoring are:
- Water stains on ceilings beneath or near the valley line. If water is entering the roof cavity, the valley has failed. This is not a future risk but an active leak.
- Visible rust holes when you look at the valley from inside the roof cavity (if accessible) or from the roof surface. Even one hole means the steel has corroded through.
- Sections of valley lifting or separating from the valley board. The flashing is no longer secured and can be lifted by wind, allowing rain to enter.
- Persistent dampness or mould in the roof cavity near the valley. Even without a visible drip, moisture entering through a failing valley creates condensation and mould inside the roof space.
For leaking roof repairs across Melbourne’s northern suburbs, contact Roof Restoration Northern Suburbs for an inspection and quote.
We service all northern suburbs including Bundoora, Epping, Coburg, Preston, and surrounding areas.
Browse our previous restorations to see completed valley replacement and roof restoration projects.
Roof Valley Replacement
When Melbourne valleys need replacing, what materials last longest, the step-by-step process, and when to repair vs replace.
Why Valleys Fail
Corrosion and Rust
Zinc coating wears off over 30 to 50 years. Bare steel rusts through. Holes develop. No sealant fixes it. Most common failure mode.
#1 CAUSE
Debris Damming
Leaves and twigs trap moisture against the metal. Accelerates corrosion. Creates dams that push water sideways under tiles.
Mortar Failure
Old mortar bedding cracks and separates over decades. Creates gaps where water enters between the tiles and the valley flashing.
Physical Damage
Falling branches, foot traffic, hail. Dents create pooling points. Punctures allow direct water entry into the roof cavity.
The Replacement Process
Assess and Prepare
Full roof inspection. All valleys checked, not just the failed one. Other issues noted for repair alongside the valley work.
Lift Tiles
3 to 5 tile courses on each side carefully lifted and stacked. Cracked or broken tiles noted for replacement.
Remove Old Valley
Old flashing removed. Nails, mortar, and debris cleared. Valley board cleaned of all rust residue and old sealant.
Inspect Valley Board
Timber board checked for rot and water damage. Damaged sections replaced or reinforced before new flashing is installed.
CRITICAL CHECK
Install New Valley
New Colorbond or zincalume flashing cut to length, laid along the valley board, fixed with compatible fasteners, joints overlapped and sealed.
Relay Tiles and Test
Tiles relaid with correct overlap and clearance. Flexible sealant applied. Water-tested with a hose to confirm no leaks.
Valley Materials Compared
Colorbond Steel
30 to 50 years. Colour-coated over zincalume base. Corrosion-resistant. Colour-matched to the roof. Industry standard.
RECOMMENDED
Zincalume
25 to 40 years. Zinc and aluminium alloy. Unpainted. Slightly less corrosion-resistant than Colorbond. Budget-friendly option.
GOOD ALTERNATIVE
Old Galvanised Steel
20 to 35 years. The material being replaced. Inferior corrosion resistance. No longer used for new installations.
NOT RECOMMENDED
Repair vs Replace
Repair May Be Enough
Surface rust only, no holes, steel still solid
One or two small isolated holes
Mortar failure but valley metal is sound
Replacement Needed
Multiple rust holes or widespread corrosion
Steel thinning or disintegrating
Valley too narrow or incorrectly installed
Active leak into ceiling cavity
💡 The Key Takeaway
Roof valleys handle more water than any other part of your roof. When they fail, water goes into your ceiling, not your gutter. If your valleys have rusted through, no amount of sealant or patching provides a lasting fix. Replacement with Colorbond steel gives you 30 to 50 years of protection, and the most cost-effective time to do it is during a full roof restoration when the tiles are already being worked on.
roofrestorationnorthernsuburbs.com.au | Roof Restoration Northern Suburbs | Melbourne's Northern Suburbs
Frequently Asked Questions
Q1. How long does a roof valley replacement take?
A single valley replacement typically takes one day, including tile removal, old valley removal, valley board inspection, new flashing installation, tile relaying, and testing. Multiple valleys on the same roof may take two to three days depending on complexity. If the valley replacement is part of a larger roof restoration, it is completed as part of the overall project timeline.
Q2. How much does roof valley replacement cost in Melbourne?
The cost depends on the length of the valley, the material used (Colorbond is standard), the condition of the valley board underneath (repair adds cost), and whether it is a standalone job or part of a full restoration (bundled into a restoration is more cost-effective). For accurate pricing, contact Roof Restoration Northern Suburbs for a free inspection and quote. The roof repointing cost guide covers how roofing pricing works generally.
Q3. Can a roof valley be repaired instead of replaced?
If the valley has surface rust only (no holes, steel still structurally sound), it can be treated, sealed, and painted to extend its life by 5 to 10 years. If there are one or two small holes, patching with compatible flashing buys time. If there are multiple rust holes, widespread corrosion, or the steel is thinning, replacement is the only lasting solution. Patching a valley that has reached the end of its service life is not cost-effective because the patches will fail as the surrounding metal continues to corrode.
Q4. What material is used for new roof valleys?
Colorbond steel is the current industry standard for residential valley replacement in Melbourne. It has a baked-on colour coating over a zincalume base (zinc and aluminium alloy) that provides 30 to 50 years of corrosion resistance. Zincalume (unpainted) is a slightly more affordable alternative with 25 to 40 years of life. Old galvanised steel (what is typically being replaced) is no longer used for new installations because its corrosion resistance is significantly inferior to modern options.
Q5. If one valley has failed, should I replace all valleys on my roof?
If one valley has failed from corrosion, the other valleys (installed at the same time from the same material) are likely in a similar condition. It is worth having all valleys inspected. Replacing all failing valleys in a single project is more cost-effective than doing them one at a time because the setup, access, and tile handling only happens once. At a minimum, any valley showing rust holes or widespread corrosion should be replaced alongside the failed one. Read the roof valley problems guide for the full diagnostic checklist.
Do not wait for a small problem to become a big one. If you have spotted broken, cracked, or missing tiles on your Melbourne northern suburbs home, the team at Roof Restoration Northern Suburbs is ready to help. Get in touch today for a no-obligation inspection and quote.
Contact us today for a free, no‑obligation roof assessment and quote.
If you want a thorough and safe roof cleaning, don’t hesitate to reach out to us for expert services. We can handle everything from roof cleaning to roof restoration.
- 0489 088 778
- info@roofrestorationnorthernsuburbs.com.au
- 32 Milleara Road Keilor East VIC 3033
- Mon-Sat : 8AM – 5PM