Roof Rebedding: What Happens When the Mortar Under Your Ridge Caps Breaks Down, How to Tell If Yours Needs It, and What the Process Involves From Start to Finish
- Blog
- November 17, 2026
Quick Overview:
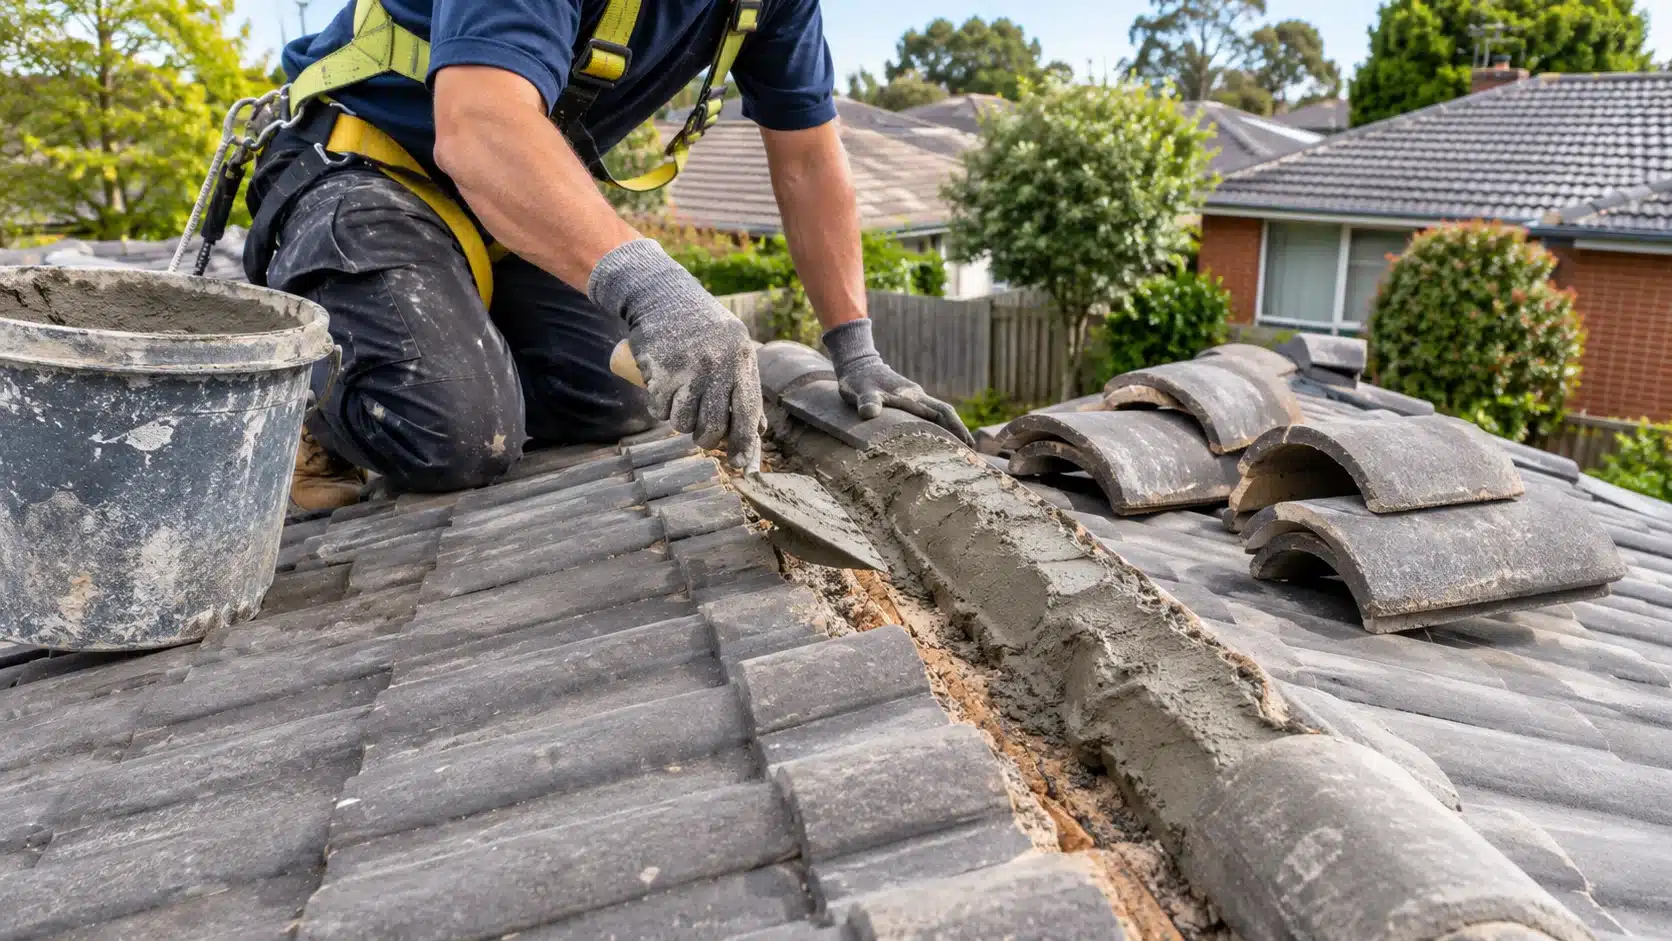
Roof rebedding is the process of lifting ridge caps, removing the old mortar bed underneath, and re-laying the caps on fresh bedding mortar. It is the structural step in ridge cap maintenance. Over time, the sand and cement mortar that holds ridge caps in place breaks down from weather exposure, thermal movement, and moisture penetration. In Melbourne, where roofs endure temperature swings from summer heat to winter frost, this breakdown is accelerated. When the bedding mortar fails, ridge caps become loose, water enters the roof cavity, and the structural seal along the ridge line is compromised. Rebedding is different from repointing. Repointing is the finishing step where flexible pointing compound is applied along the edges of the ridge caps to seal the joints. Rebedding is the foundation work underneath. When the bedding mortar has crumbled or separated from the tiles, repointing alone will not fix the problem because the caps themselves are no longer seated properly. Most tiled roofs in Melbourne need rebedding after twenty to thirty years, though harsh weather, poor original materials, or inadequate drainage can bring that forward. At Roof Restoration Northern Suburbs, we assess the condition of both the bedding and the pointing before recommending work, so you only pay for what your roof actually needs.
What Roof Rebedding Actually Is
Ridge caps are the shaped tiles that sit along the peak (ridge) and edges (hips) of a tiled roof. They cover the join where two roof planes meet, creating a watertight seal along the highest and most exposed lines of the roof.
These caps are held in place by a bed of mortar, which is a mix of sand and cement applied directly to the top course of roof tiles. The mortar anchors the caps and fills the gap between the cap and the tile surface beneath it. When this mortar is intact, the caps are firmly seated and the ridge line is sealed.
Table of Contents
ToggleRebedding is the process of removing caps from their old mortar bed, cleaning the tile surface underneath, and re-laying the caps on a fresh mortar bed. It is not a repair or a patch. It is a full replacement of the bedding mortar along the ridge and hip lines.
This is distinct from repointing, which is the application of flexible pointing compound along the exposed edges of the caps after they have been bedded. Repointing seals the joints. Rebedding provides the structural foundation. Both are necessary for a complete ridge cap restoration, but they address different problems and are not interchangeable.
Why Bedding Mortar Fails
The mortar under ridge caps is exposed to some of the harshest conditions on the roof. It sits at the highest point, fully exposed to sun, rain, wind, and temperature changes. Over time, several factors cause it to deteriorate.
Thermal expansion and contraction. Melbourne’s climate produces significant temperature swings, with roof surfaces reaching over 60 degrees Celsius on a summer afternoon and dropping close to freezing on a winter night. The mortar, the ridge caps, and the tiles underneath all expand and contract at different rates. This repeated movement creates micro-cracks in the mortar, which widen over successive seasons until the mortar loses its grip on the caps.
Moisture penetration. Once micro-cracks form, rainwater enters the mortar. In winter, that water can freeze and expand, breaking the mortar further from the inside. Even without freezing, constant wetting and drying cycles degrade the cement binder. Over years, what was once a solid mortar bed becomes soft, powdery, and structurally weak.
Original mix quality. Not all mortar mixes are equal. Mortar that was mixed too lean (not enough cement) or too rich (too much cement and not enough sand) fails earlier. A lean mix lacks strength. A rich mix cracks because it is too rigid to handle thermal movement. Builders who cut corners during the original roof installation by using poor quality mortar create problems that surface fifteen to twenty years later.
Vibration and wind. Tiles move slightly under wind load, and the cumulative vibration over decades loosens the bond between the mortar and the tile surface. Melbourne’s exposed northern suburbs, where roofs are open to wind from multiple directions, see this effect more than sheltered inner-city locations.
Tree debris and biological growth. Leaves, moss, and lichen trap moisture against the mortar and accelerate its breakdown. If your roof sits under trees, the bedding mortar will typically deteriorate faster than on a roof in open sun. Regular roof cleaning reduces this, but it does not stop the underlying ageing of the mortar.
How to Tell If Your Roof Needs Rebedding
Some signs point specifically to bedding mortar failure rather than just pointing failure. Knowing the difference helps you understand what work is actually needed and avoid paying for repointing when rebedding is the real issue.
Ridge caps that move or wobble. If you can see caps shifting in the wind, or if a roofer reports that caps are loose during an inspection, the bedding mortar has failed. Repointing cannot fix a loose cap because the pointing compound is a surface seal, not a structural adhesive. The cap needs to be lifted and re-laid on fresh mortar.
Visible mortar crumbling or missing. From the ground, you may be able to see chunks of grey mortar on the roof surface, in the gutters, or on the ground around the house. This is old bedding mortar that has broken away. If the mortar is falling off the ridge line, the caps above it are either already loose or close to it. Check your gutters for mortar debris as a first indicator.
Gaps between caps and tiles. When bedding mortar shrinks or breaks down, gaps open between the underside of the ridge cap and the top course of tiles. These gaps are entry points for water, wind-driven rain, birds, and insects. If you can see daylight between the caps and the tiles from inside the roof cavity, the bedding has failed.
Water stains in the ceiling below the ridge. If your roof is leaking and the stains are along the centre of the ceiling (directly below the ridge line), failed bedding mortar is a likely cause. Water enters through the gaps left by deteriorated mortar and runs down the roof timbers to the ceiling below.
Pointing that keeps cracking or falling off. If you have had the pointing redone recently but it is already cracking or separating, the problem is likely underneath. Flexible pointing compound needs a stable surface to bond to. If the bedding mortar is crumbling, the pointing has nothing solid to adhere to and fails prematurely. This is one of the most common signs that rebedding was needed but only repointing was done.
Mortar dust in the roof cavity. If you go into your roof space and see fine grey dust or small chunks of mortar on the sarking or insulation below the ridge line, the bedding is breaking down from the inside. This is an early-stage indicator that is easy to miss if you do not inspect the roof cavity.
What the Rebedding Process Involves
Rebedding is methodical work that follows a specific sequence. Understanding the steps helps you assess whether a quote is thorough or cutting corners.
Step one: Roof inspection and assessment. The roofer inspects the entire ridge and hip lines to assess the condition of the existing bedding and pointing. They check how many caps need rebedding (sometimes only sections have failed rather than the entire ridge), the condition of the caps themselves (cracked or broken caps may need replacing), and the state of the tiles underneath. This assessment determines the scope and cost of the work.
Step two: Removing the ridge caps. Each cap is carefully lifted off the old mortar bed. This must be done without damaging the caps (if they are being reused) or the top course of tiles underneath. On older roofs, caps that have been cemented in place for decades can be difficult to remove without cracking them. A skilled roofer uses the right technique to lift them cleanly. Caps that are cracked or broken during removal are set aside for replacement.
Step three: Cleaning the ridge and hip lines. All old mortar is removed from the top course of tiles. The surface is cleaned of dust, debris, and any biological growth. This step is critical because the new mortar needs to bond to a clean, sound tile surface. Any old mortar left behind creates a weak point in the new bed.
Step four: Applying fresh bedding mortar. A new mortar bed is applied to the ridge or hip line. The mix is typically a sand and cement blend, mixed to the right ratio for strength and flexibility. Some roofers add a plasticiser or bonding agent to improve adhesion and workability. The mortar is applied in a continuous bed along the ridge, thick enough to fully seat the cap and fill the gap between the cap and the tile surface.
Step five: Re-laying the caps. The ridge caps are placed back onto the fresh mortar bed and pressed firmly into position. The roofer ensures each cap is level, aligned with its neighbours, and fully bedded in the mortar with no gaps or voids underneath. The caps need to be set at the right height so that the overlap between adjacent caps is correct and water sheds properly.
Step six: Repointing. Once the mortar has set sufficiently (usually the following day), flexible pointing compound is applied along the edges of the caps to seal the joints between the cap and the tile surface. This is the finishing step that completes the watertight seal. Flexible compound is essential rather than rigid cement, because rigid pointing cracks under thermal movement and needs replacing within a few years.
What Happens When Repointing Is Done Without Rebedding
This is one of the most common mistakes in roof maintenance, and it creates a cycle of repeated spending without solving the underlying problem.
When the bedding mortar has failed but only the pointing is replaced, the new pointing is bonding to a surface that is structurally compromised. The caps are still loose or poorly seated. The mortar underneath is still crumbling. The pointing compound has nothing solid to adhere to.
The result is that the new pointing cracks and separates within one to three years, often along the same lines as the old pointing. The homeowner pays for repointing again, and the cycle continues. Each round of repointing costs money but does not fix the actual problem.
The worse outcome is water damage. Pointing that appears intact from the outside can mask failed bedding underneath. Water still enters through the gaps in the mortar bed, runs into the roof cavity, and damages insulation, timber, and ceilings. By the time the damage is visible inside the house, it has often been progressing for years. Our guide on roof leak causes covers how ridge line failures contribute to water entry.
A reputable roofer will inspect the bedding condition before quoting on repointing and will recommend rebedding if the mortar is compromised. If a quote jumps straight to repointing without assessing the bedding, ask specifically about the mortar condition. Knowing the right questions to ask a roofing company before hiring helps you avoid this scenario.
How Long Rebedding Lasts
Properly done rebedding with the right mortar mix and thorough surface preparation should last twenty to thirty years before it needs attention again. The variables that affect this are:
Mortar quality. A correctly proportioned sand and cement mix (typically four parts sand to one part cement for bedding) with a bonding agent provides the best balance of strength and flexibility. Too much cement makes the mortar brittle. Too little makes it weak.
Surface preparation. New mortar bonded to a clean, sound tile surface lasts significantly longer than mortar laid over dust, debris, or remnants of old mortar. This is where the quality of the roofer’s work shows up years later.
Pointing quality. Flexible pointing compound over the bedding extends the life of the bedding by keeping water out of the mortar. Rigid cement pointing cracks within a few years and allows water into the bedding, which accelerates its breakdown. This is why rebedding and repointing should always be done together as a complete system.
Roof maintenance. Regular roof maintenance including gutter cleaning, debris removal, and periodic inspections catches early signs of mortar deterioration before they become failures. A roof that is inspected and maintained every few years will get more life out of its rebedding than one that is ignored until caps start falling off.
Climate exposure. Roofs in Melbourne’s northern suburbs that are fully exposed to weather on all sides age faster than sheltered roofs. North-facing ridge lines get the most sun and thermal stress. South-facing ridges get the most moisture retention. Both contribute to mortar breakdown, just through different mechanisms.
Rebedding as Part of a Full Roof Restoration
Rebedding is often done as part of a broader roof restoration rather than as a standalone job. When a roof reaches the age where the bedding mortar is failing, other components are usually showing wear as well: tiles may be cracked or loose, valleys may need replacing, flashing may be lifting, and the roof paint may be faded or peeling.
Doing rebedding as part of a full restoration is more cost-effective than addressing each issue separately over several years. The roofer is already on the roof with scaffolding or roof access equipment in place, and addressing everything in one project avoids multiple callout fees, multiple rounds of setup, and multiple disruptions.
That said, rebedding can absolutely be done as a standalone job when it is the only issue. If your tiles, valleys, and flashing are all in good condition but the bedding mortar has failed, there is no reason to pay for a full restoration. A standalone rebedding and repointing is a targeted fix for a specific problem.
Contact Roof Restoration Northern Suburbs for a ridge line inspection. We will assess the condition of your bedding and pointing and recommend only the work your roof needs.
Roof Rebedding Explained
What it is, why the mortar under your ridge caps fails, and what the full rebedding process looks like.
Rebedding vs Repointing
🧱 Rebedding
Lifts ridge caps off the roof
Removes all old mortar underneath
Lays fresh bedding mortar
Re-seats caps firmly in position
Provides the structural foundation
FIXES: loose caps, crumbling mortar, structural gaps
🔧 Repointing
Applied along cap edges after bedding
Uses flexible pointing compound
Seals joints against water and wind
Handles thermal movement without cracking
Provides the watertight surface seal
FIXES: surface gaps, cracked pointing, water entry at edges
Why Bedding Mortar Fails
Thermal Movement
Mortar, caps, and tiles expand and contract at different rates. Repeated cycles create micro-cracks that widen each season.
Moisture Penetration
Water enters cracks, freezes in winter, and expands. Constant wet-dry cycles degrade the cement binder over years.
Poor Original Mix
Mortar mixed too lean lacks strength. Mortar mixed too rich cracks because it cannot flex. Both fail early.
Signs Your Roof Needs Rebedding
Caps Wobble or Shift
Visible movement in wind means the mortar bed has lost its hold. Repointing alone will not fix this.
Mortar Debris in Gutters
Grey chunks of mortar on the roof, in the gutters, or on the ground. The bedding is breaking apart.
Gaps Under Ridge Caps
Visible gaps between caps and tiles. Entry points for water, wind-driven rain, birds, and insects.
Ceiling Stains Below Ridge
Water stains along the centre of the ceiling mean water is entering through the ridge line.
Pointing Keeps Failing
If new pointing cracks within a couple of years, the bedding underneath is the real problem.
Dust in Roof Cavity
Fine grey mortar dust on sarking or insulation under the ridge. Early stage indicator.
The Rebedding Process
Inspect Ridge and Hips
Assess bedding condition, cap integrity, and scope of work needed.
Remove Ridge Caps
Carefully lift each cap without damaging it or the tiles underneath.
Clean Tile Surface
Remove all old mortar, dust, and debris. New mortar needs a clean surface to bond.
Apply Fresh Mortar Bed
Lay new sand-cement mortar along the ridge. Correct ratio for strength and flexibility.
Re-lay Caps
Press caps firmly into mortar. Ensure level alignment, correct overlap, and no voids.
Repoint With Flexible Compound
Seal edges the following day with flexible compound. Completes the watertight system.
⚠️ The Costly Mistake
Repointing without rebedding when the mortar has failed is the most common ridge cap error. The new pointing bonds to crumbling mortar, cracks within one to three years, and the homeowner pays again without fixing the actual problem. Always have the bedding assessed before agreeing to repointing alone.
💡 Key Takeaway
Roof rebedding is the structural foundation of ridge cap maintenance. When the mortar under your caps has failed, no amount of repointing will solve the problem. Properly done rebedding with quality mortar and flexible repointing lasts twenty to thirty years and is one of the most effective ways to protect a tiled roof from water entry.
roofrestorationnorthernsuburbs.com.au | Roof Restoration Northern Suburbs | Melbourne
Frequently Asked Questions
Q1. What is the difference between roof rebedding and repointing?
Rebedding is the structural step: lifting the ridge caps, removing the old mortar bed, and re-laying the caps on fresh mortar. Repointing is the finishing step: applying flexible pointing compound along the cap edges to seal the joints. Rebedding fixes the foundation that holds the caps in place. Repointing seals the surface. When the bedding mortar has failed, both are needed. Our guide on repointing cost covers how the two relate and what each costs.
Q2. How do I know if my roof needs rebedding or just repointing?
If the ridge caps are loose, wobbly, or visibly sitting unevenly, the bedding mortar has failed and rebedding is needed. If the caps are firmly seated but the pointing along the edges is cracked or missing, repointing alone may be sufficient. A roof inspection is the most reliable way to determine which is needed. Mortar debris in the gutters or on the ground, and gaps visible between caps and tiles, are strong indicators that rebedding is required.
Q3. How long does roof rebedding take?
For an average Melbourne home with a standard ridge and hip configuration, rebedding and repointing together typically take one to two days. Larger roofs, complex hip configurations, or roofs where the existing caps are damaged and need replacing may take longer. Weather also affects timing, as mortar cannot be applied in wet conditions or extreme heat.
Q4. Can I rebed my own roof?
Rebedding involves working at the highest point of the roof, handling heavy caps, mixing and applying mortar correctly, and ensuring proper alignment and drainage. It is not recommended as a DIY job. The safety risks of working at height are significant, and incorrect mortar application or cap alignment will lead to premature failure. A professional roofer has the access equipment, materials, and experience to do the work safely and to a standard that lasts.
Q5. How often does roof rebedding need to be done?
On a well-maintained roof with quality original materials, rebedding typically lasts twenty to thirty years. Most Melbourne homes built before 2000 are either due for or overdue for their first rebedding. Factors that can shorten this include poor original mortar quality, lack of maintenance, heavy tree coverage, and extreme weather exposure. An annual or biannual roof inspection helps catch early signs of mortar deterioration.
Do not wait for a small problem to become a big one. If you have spotted broken, cracked, or missing tiles on your Melbourne northern suburbs home, the team at Roof Restoration Northern Suburbs is ready to help. Get in touch today for a no-obligation inspection and quote.
Contact us today for a free, no‑obligation roof assessment and quote.
If you want a thorough and safe roof cleaning, don’t hesitate to reach out to us for expert services. We can handle everything from roof cleaning to roof restoration.
- 0489 088 778
- info@roofrestorationnorthernsuburbs.com.au
- 32 Milleara Road Keilor East VIC 3033
- Mon-Sat : 8AM – 5PM