Roof Flashing Repair: Where Most Melbourne Roof Leaks Actually Start and How to Fix Each Type
- Blog
- October 6, 2026
Quick Overview:
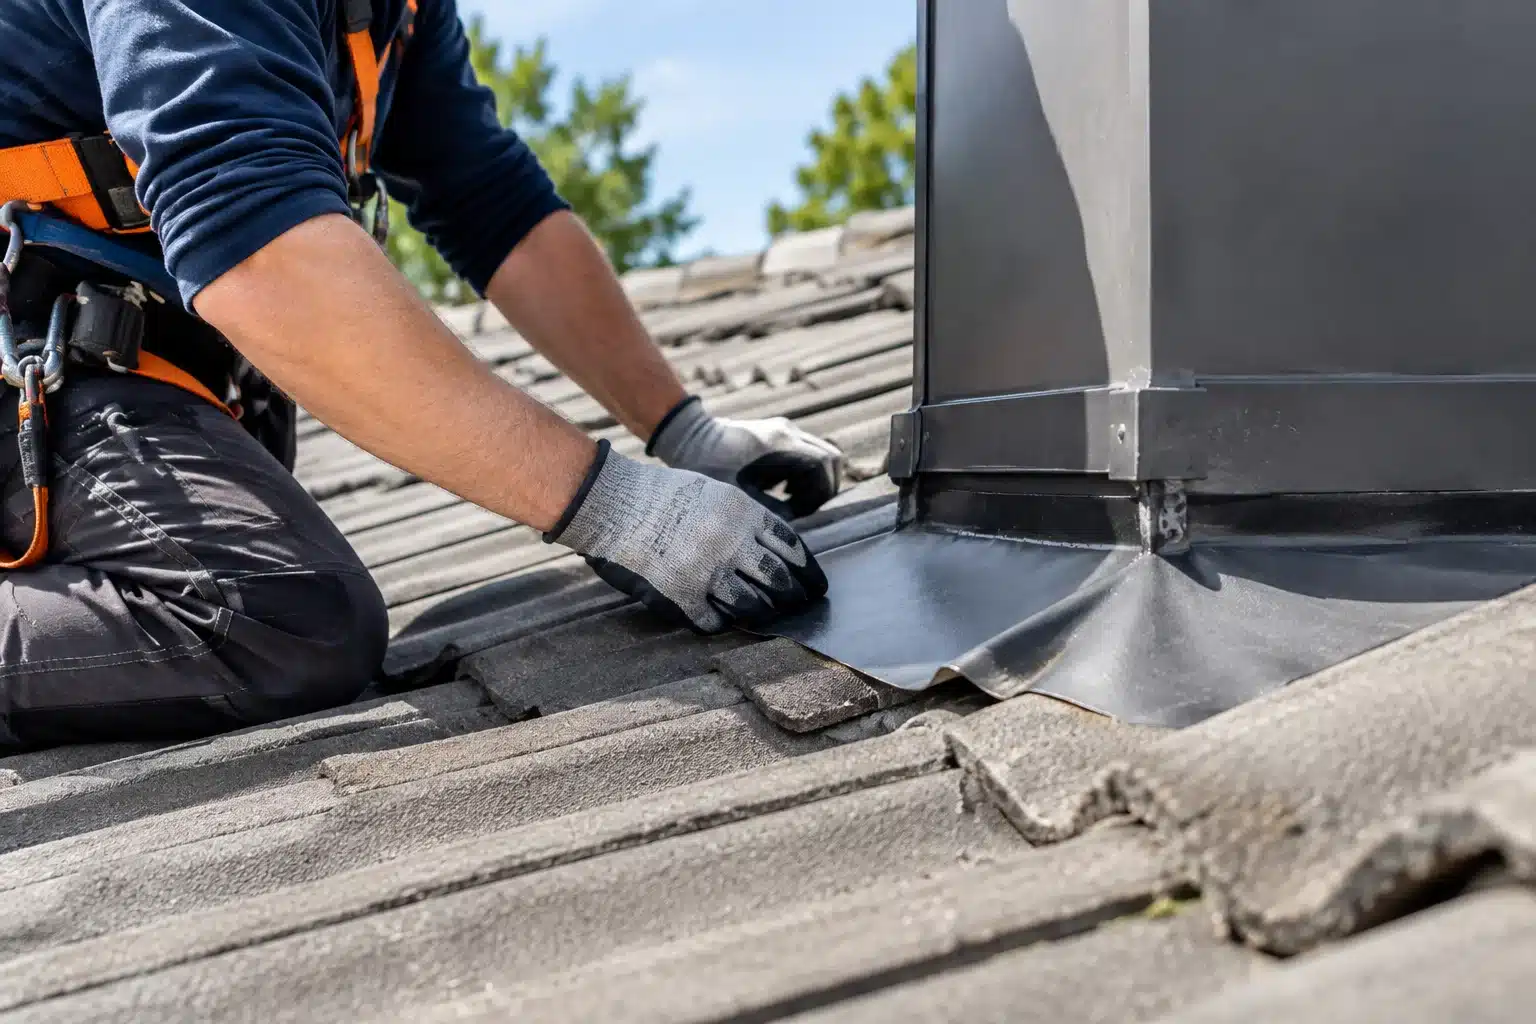
Roof flashing repair is one of the most common and most important roof maintenance tasks because the majority of roof leaks originate at flashing junctions, not through the tiles or coating themselves. Flashing is the shaped metal (typically Colorbond steel, zincalume, or lead) installed at every point where the roof surface meets another element: walls, chimneys, pipes, vents, skylights, valleys, and changes in roof plane. The flashing bridges these junctions and directs water safely down the roof surface rather than allowing it to penetrate at the join. When flashing corrodes, lifts, cracks, or separates from the surfaces it seals, water enters the roof cavity at these junctions. Because flashing failure often occurs gradually and the junctions are not visible from the ground, the leak can go undetected for months or years, causing timber decay, mould growth, insulation damage, and ceiling stains before the homeowner notices. At Roof Restoration Northern Suburbs, roof flashing repair is a standalone service and a standard component of every roof restoration we deliver across Melbourne’s northern suburbs.
What Is Roof Flashing and Why Does It Matter?
Roof tiles and metal roofing sheets are designed to shed water across a continuous plane. But no roof is a single, uninterrupted plane. Every roof has junctions where the roof surface meets a wall, a chimney, a pipe, a vent, a skylight, a parapet, or another roof plane. At each of these junctions, there is a gap that water can enter.
Flashing closes these gaps. It is a shaped metal component, custom-formed and installed to bridge the junction and redirect water onto the roof surface where it can drain normally into the gutters and downpipes.
Table of Contents
ToggleWithout intact flashing, every junction on the roof is an open path for water into the roof cavity. This is why flashing failure is the single most common cause of roof leaks and why roof flashing repair is one of the most frequently needed maintenance tasks on Melbourne homes.
“When a homeowner calls about a roof leak, the first thing I check is the flashing. In the majority of cases, the tiles are fine, the coating is fine, and the structure is fine. What has failed is a piece of flashing at a junction that has corroded, lifted, or separated from the wall. A $300 flashing repair would have prevented a $3,000 ceiling repair if it had been caught during a routine inspection.”
Types of Roof Flashing and Where Each Is Used
Different junctions require different flashing types. Each type has its own failure mode.
| Flashing Type | Where It Is Used | What It Does | Common Failure Mode |
|---|---|---|---|
| Step flashing | Where a sloping roof meets a vertical wall (side of a chimney, wall abutment, extension junction) | Steps up the wall in overlapping pieces, each tucked under a tile and into the wall mortar joint | Mortar deteriorates, releasing the flashing from the wall. Corrosion at the fold. Lifting from wind. |
| Apron flashing (front or back apron) | At the base of a chimney, skylight, or wall where the roof meets the front or back face | Single piece of metal that tucks under the tiles above and covers the junction below | Sealant failure at the top edge. Corrosion. Debris accumulation behind the apron trapping moisture. |
| Valley flashing | Where two roof planes meet at an internal angle, creating a valley | Channels water from both roof planes down the valley and into the gutter | Corrosion (particularly in galvanised valleys), debris accumulation restricting flow, rust-through holes. Covered in detail in the roof valley problems guide. |
| Pipe flashing (penetration flashing) | Around plumbing vent pipes, electrical conduits, and any cylindrical penetration through the roof | Rubber or metal collar that seals around the pipe and sits over the surrounding tiles | Rubber perishes from UV exposure and hardens, cracking and separating from the pipe. Metal corrosion at the base. |
| Chimney flashing (combination) | Around all four sides of a chimney | Combination of step flashing (sides), back apron (behind), and front apron (below). Often includes a cricket or saddle behind the chimney to divert water. | Multiple failure points: mortar release, sealant failure, lead fatigue, corrosion, missing or failed cricket allowing water to pool behind the chimney. |
| Barge flashing (verge flashing) | Along the sloping edge of a gable roof where the tiles terminate at the gable end | Covers the junction between the last tile and the barge board or wall | Lifting from wind exposure at the gable end. Corrosion. Sealant failure along the top edge. |
| Parapet flashing | Where the roof meets a parapet wall (common on commercial buildings and some residential extensions) | Covers the top of the parapet and directs water back onto the roof | Sealant failure at the wall junction. Ponding water behind the parapet. Corrosion from standing water. |
How Flashing Fails: The Five Causes
Flashing does not fail randomly. The causes are predictable.
Corrosion. Metal flashing corrodes over time from exposure to rain, humidity, salt air (less of a concern inland but relevant in Melbourne’s bayside northern suburbs), and contact with incompatible metals (galvanic corrosion). Galvanised steel flashings corrode faster than Colorbond or zincalume. Lead flashing resists corrosion well but fatigues from thermal cycling. Once the flashing corrodes through, water passes directly through the holes into the roof cavity.
Sealant and mortar failure. Step flashing and apron flashing rely on sealant or mortar to hold the top edge against the wall. Sealant has a limited lifespan (typically 10 to 15 years) and shrinks, cracks, and separates from the wall with age. Mortar holding step flashing into wall joints deteriorates from the same thermal cycling and weather exposure that affects ridge capping mortar. When the sealant or mortar fails, the top edge of the flashing lifts away from the wall, and water runs behind it.
Thermal movement. Metal expands in heat and contracts in cold. Melbourne’s temperature swings (particularly the rapid heating and cooling of a metal roof or flashing in direct sun) cause repeated expansion and contraction cycles that fatigue the metal at folds and bends. Over decades, this fatigue can crack the flashing at its formed edges.
Wind lift. Exposed flashing edges, particularly on gable roofs and at chimney locations, catch wind during storms. Repeated wind lift loosens fixings and separates the flashing from the surface it seals. Once lifted, the flashing no longer sits flat against the junction, and wind-driven rain enters behind it.
UV degradation (rubber flashings). Pipe flashings with rubber collars perish from UV exposure. The rubber hardens, cracks, and separates from the pipe, leaving a gap around the penetration that allows water entry. Rubber pipe flashings typically need replacement every 10 to 15 years.
Signs Your Flashing Has Failed
Some signs are visible from the ground or from inside the house. Others require a professional roof inspection.
From inside the house:
Water stains on ceilings or walls near a chimney, wall junction, or skylight indicate water is entering at that flashing point. Stains that appear or worsen after rain, particularly wind-driven rain from a specific direction, strongly suggest flashing failure on the side of the roof facing that direction. Damp or musty smell in rooms adjacent to roof junctions. Active dripping during heavy rain near a junction. For how leaks connect to interior damage, read how roof leaks affect your home.
From the ground (visible on some homes):
Rust staining running down the wall below a roof junction. Flashing visibly lifted or separated from the wall. Flashing bent or displaced after a storm. Sealant visibly cracked or missing along the top edge of flashing. For the full checklist of external warning signs, read the signs of roof damage Melbourne guide.
From inside the roof cavity:
Daylight visible at any junction (wall, chimney, pipe) when viewed from inside with a torch. Water stains on the underside of the roof sarking near junctions. Damp or decayed timber near chimney, wall, or pipe penetrations. Mould growth on timbers adjacent to flashing points.
For a comprehensive check, a professional roof inspection examines every flashing point from the roof surface and from inside the cavity.
What Roof Flashing Repair Involves
The repair approach depends on the type of flashing and the nature of the failure.
Resealing. If the flashing metal is still in sound condition but the sealant or mortar holding the top edge to the wall has failed, the old sealant is removed, the surface is cleaned, and new polyurethane or silicone sealant rated for roofing applications is applied. This is the simplest and least expensive repair, suitable when the flashing itself is not corroded or damaged.
Partial replacement. If a section of step flashing has corroded or a pipe flashing rubber has perished, the failed section is removed and replaced with new material. Adjacent tiles are lifted to access the flashing underneath, the new flashing is installed and sealed, and the tiles are repositioned. Partial replacement is appropriate when the failure is localised to one section.
Full replacement. If the flashing is extensively corroded, fatigued, or was incorrectly installed originally, the entire flashing at that junction is replaced. This involves removing tiles around the junction, removing the old flashing completely, installing new flashing (typically Colorbond or zincalume to match the roof), sealing into the wall, and replacing the tiles. Full replacement is the most durable long-term solution.
Cricket or saddle installation. Behind chimneys on sloping roofs, water can pool if no cricket (a small peaked diverter) is installed behind the chimney. If the existing flashing has failed partly because water pools behind the chimney, a cricket is installed as part of the repair to divert water around the chimney and down the roof.
At Roof Restoration Northern Suburbs, flashing repair uses Colorbond steel as the standard replacement material because it resists corrosion, colour-matches the roof, and outlasts galvanised steel significantly.
Flashing Repair as Part of a Roof Restoration
When roof flashing repair is needed alongside other work (repointing, tile repairs, valley replacement, roof painting), combining everything in a single roof restoration is the most cost-effective approach. The tradesperson is already on the roof with equipment set up, tiles are already being lifted for repointing and tile replacement, and the new flashing is painted along with the rest of the roof for a consistent finish.
| Scenario | Best Approach |
|---|---|
| Single flashing junction leaking, rest of roof in good condition | Standalone flashing repair at the affected junction |
| Multiple flashing points failing, tiles and coating still sound | Targeted flashing replacement at all failed junctions |
| Flashing failing alongside ridge mortar, tile damage, and coating wear | Full roof restoration addressing everything in one project |
| Flashing failing and roof approaching replacement age | Assess whether restoration or replacement is more cost-effective via a roof inspection |
The roof restoration cost Melbourne guide covers how flashing replacement fits within a full restoration budget. The roof repointing cost guide covers the related ridge capping work that is often done at the same time.
The Cost of Ignoring Failed Flashing
Flashing failure is a slow, invisible leak that causes cumulative damage.
Water enters the roof cavity. Every rain event sends water through the failed junction. Initially, the sarking underneath may catch it. Over time, concentrated water flow at the junction deteriorates the sarking.
Timber damage begins. Once water passes the sarking, it contacts the timber battens and rafters adjacent to the junction. Wet timber promotes timber decay, mould, and weakening of the structural fixings. Read how roof leaks affect your home for the full damage cascade.
Insulation becomes waterlogged. Wet insulation loses its thermal performance and becomes a mould incubator. Replacing waterlogged insulation adds to the remediation cost.
Ceiling damage appears. Water stains on the ceiling are typically the first visible sign the homeowner notices. By this point, the leak has been active for months or years, and the damage above the ceiling is more extensive than the stain suggests.
Electrical hazards. Water entering the roof cavity near electrical wiring, junction boxes, or downlights creates a serious safety hazard.
A flashing repair caught early (resealing or partial replacement) costs a fraction of the combined cost of flashing replacement plus timber repair, insulation replacement, ceiling restoration, and potential electrical remediation after months of undetected leaking. The roof maintenance checklist covers when to inspect every roof component, including flashing, proactively. For emergency situations, read how to stop a roof leak temporarily and why is my roof leaking when it rains.
Roof Flashing Repair: Where Most Roof Leaks Start
The types of flashing on your roof, how each one fails, and what the repair involves.
Types of Flashing and Where They Are Used
Step Flashing
Where the sloping roof meets a vertical wall. Steps up the wall in overlapping pieces tucked under each tile.
FAILS: Mortar releases, metal corrodes
Apron Flashing
Base of a chimney, skylight, or wall. Single piece covering the front or back junction.
FAILS: Sealant cracks, debris traps moisture
Valley Flashing
Where two roof planes meet at an internal angle. Channels water from both planes into the gutter.
FAILS: Corrosion, debris blocks flow
Pipe Flashing
Around plumbing vent pipes and electrical conduits penetrating the roof.
FAILS: Rubber perishes from UV in 10 to 15 years
Chimney Flashing
All four sides of a chimney. Step flashing (sides), aprons (front/back), often with a cricket behind.
FAILS: Multiple failure points at once
Barge Flashing
Along the sloping edge of a gable roof where tiles end at the gable wall or barge board.
FAILS: Wind lifts the edge, sealant cracks
Five Causes of Flashing Failure
Corrosion
Metal rusts through over decades. Galvanised fails fastest. Colorbond resists longest.
Sealant Failure
Sealant shrinks, cracks, and separates after 10 to 15 years. Top edge lifts from the wall.
Thermal Movement
Expansion and contraction fatigues metal at folds and bends over thousands of cycles.
Wind Lift
Storm winds catch exposed edges, loosen fixings, and separate flashing from the sealed surface.
UV Degradation
Rubber pipe flashings perish from UV. Harden, crack, and separate from the pipe. Replace every 10 to 15 years.
Warning Signs of Flashing Failure
From Inside the House
Water stains near chimneys, walls, or skylights
Stains that worsen after directional rain
Damp or musty smell near roof junctions
From the Ground
Rust staining on walls below a roof junction
Flashing visibly lifted or bent
Sealant cracked or missing along the top edge
From Inside the Roof Cavity
Daylight visible at any junction
Water stains on sarking near junctions
Damp or decayed timber near flashing points
What Happens If You Ignore Failed Flashing
Water Enters
Every rain event sends water through the failed junction. Sarking catches it initially.
Timber Damage
Battens and rafters absorb moisture. Decay and mould develop. Structural fixings weaken.
Insulation Fails
Wet insulation loses thermal performance and becomes a mould incubator. Needs full replacement.
Ceiling Damage
Stains appear. By now, damage above the ceiling has been accumulating for months or years.
💡 The Bottom Line
Most roof leaks start at the flashings, not the tiles. The metal seals at every junction, penetration, and transition on your roof have a finite lifespan and fail gradually. Catching flashing failure early (a simple reseal or partial replacement) costs a fraction of the damage it causes when ignored. If you have water stains near a chimney, wall junction, skylight, or pipe, the flashing at that point has almost certainly failed.
roofrestorationnorthernsuburbs.com.au | Roof Restoration Northern Suburbs
Frequently Asked Questions
Q1. What is the most common cause of roof leaks in Melbourne?
Failed flashing is the most common cause. Flashing seals every junction on the roof (walls, chimneys, pipes, vents, skylights, valleys), and these junctions are where water enters when the seal fails. The tiles and coating on the main roof surface can be in excellent condition while a single failed flashing junction allows water into the cavity with every rain event. A roof inspection checks every flashing point.
Q2. How long does roof flashing last?
Colorbond and zincalume flashing typically lasts 25 to 40 years depending on exposure and installation quality. Galvanised steel flashing lasts 15 to 25 years before corrosion becomes significant. Lead flashing resists corrosion well but fatigues from thermal cycling over 30 to 50 years. Rubber pipe flashings last 10 to 15 years before the rubber perishes from UV exposure. The sealant holding flashing to walls typically lasts 10 to 15 years and usually fails before the metal.
Q3. Can I repair roof flashing myself?
We do not recommend it. Flashing repair requires working on the roof at junctions that are often the most complex and hazardous areas to access (chimney bases, wall abutments, pipe penetrations). Incorrect flashing installation or sealing creates leaks that may not become apparent until significant damage has occurred in the roof cavity. Tiles surrounding the flashing must be carefully lifted and repositioned without cracking them. Professional flashing repair ensures the junction is correctly sealed and the surrounding tiles are undamaged.
Q4. How do I know if my flashing needs repair?
Water stains on ceilings or walls near a chimney, wall junction, skylight, or pipe penetration are the most common indicator of flashing failure. Rust staining on walls below a roof junction, visible flashing lifting or corrosion from the ground, and damp or musty smells near roof junctions are also signs. Inside the roof cavity, daylight visible at a junction, water staining on sarking near junctions, and damp timbers near flashing points all confirm failure. A professional roof inspection provides a definitive assessment.
Q5. Should I replace all the flashing during a roof restoration?
Not necessarily. During a roof restoration, every flashing junction is inspected. Flashings that are still in sound condition (no corrosion, no lifting, sealant intact) are left in place. Flashings that have failed or are showing signs of imminent failure are replaced. Replacing all flashing regardless of condition adds unnecessary cost. However, when galvanised flashings are 20+ years old and showing early corrosion, proactive replacement during the restoration is often recommended because they are likely to fail within a few years after the restoration, requiring a separate, more expensive return visit.
Do not wait for a small problem to become a big one. If you have spotted broken, cracked, or missing tiles on your Melbourne northern suburbs home, the team at Roof Restoration Northern Suburbs is ready to help. Get in touch today for a no-obligation inspection and quote.
Contact us today for a free, no‑obligation roof assessment and quote.
If you want a thorough and safe roof cleaning, don’t hesitate to reach out to us for expert services. We can handle everything from roof cleaning to roof restoration.
- 0489 088 778
- info@roofrestorationnorthernsuburbs.com.au
- 32 Milleara Road Keilor East VIC 3033
- Mon-Sat : 8AM – 5PM